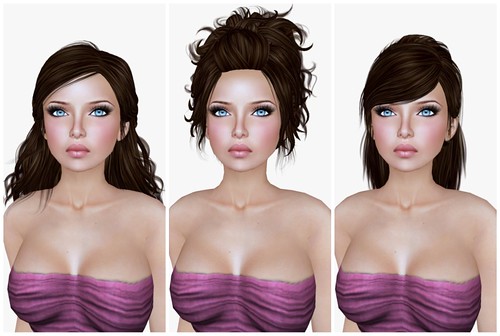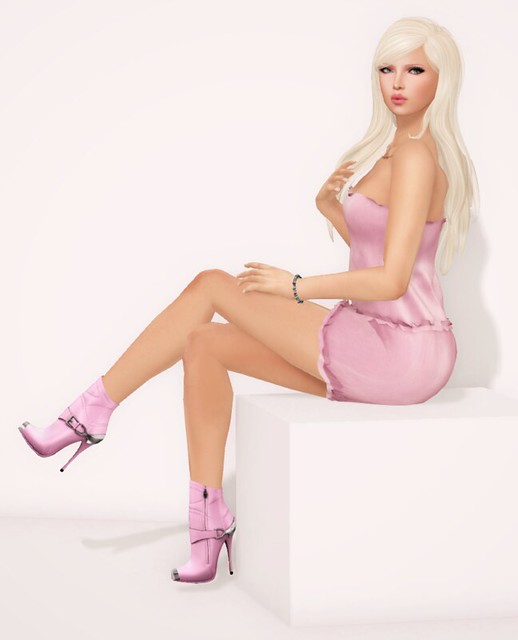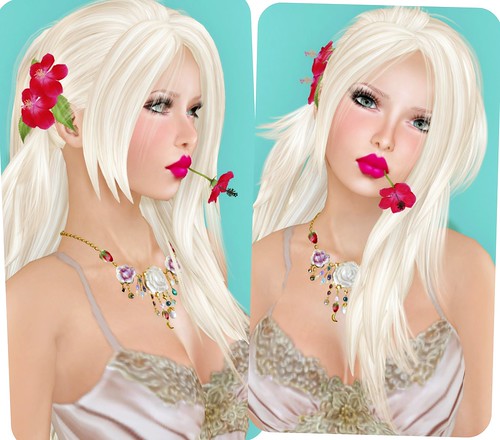
This week’s Truth release is very cute, I really can’t pick a favorite since I like them all. My friend Elle showed me a picture of a style with braids and loose waves and she said she would ask Truth to make it and….. he did! You can see Elle wearing it here, on her blog.
Do you dislike the default Gray SL 2.0 viewer colors? I’ve always thought it was too dark, but I didn’t want to use a Third Party Viewer to have different skins.
My friend Melanie showed me these Starlight Skins awhile ago, and finally I tried it today to get the awesome Silver Pink skins and it’s so awesome!! I looooove my SL viewer now.
I’m using Second Life Viewer 2.5.2 (2.5.2.223426) & add-on StarLight 2.5.3 skins.
Follow the instructions on this website to install it, it’s super easy.
The Starlight skin is not just pretty, it also adds some useful changes to the default viewer. My favorite is the new “Pops up sky editor window” button and also draw distance slider.
What’s Second Life like post-PBR? It’s darker, it’s brighter, it’s more saturated—honestly, it’s so confusing! To help cope with these wild lighting changes, I created a Day Cycle complete with sky and water presets. You can apply this day cycle to your land, or even to your avatar, taking it with you wherever you go.
I have a lot of waterfront homes, and the water is completely wrecked by PBR. However, it’s a little more tolerable when you apply my day cycle, bringing back some of that nice, blue, shimmery water we all love. I aimed not to make it too bright, as this is a neutral day cycle. But don’t worry, I have plans for more vibrant day cycles in the future!
And guess what? I made a video to showcase it all! I even generated the custom music and song with the help of AI. I hope you enjoy it, and thank you so much for your kind words! If you have any lighting requests, just let me know in the comments.
When brands leave popular social media platforms, it becomes incredibly hard to keep up with their releases. That’s what happened with Toksik. For whatever reason, probably money, they decided to leave Flickr, and since then it’s been a challenge to track their new releases or even look back at what I already own or might want to buy. I find it a little odd that so many designers say they left Flickr because it’s “too expensive,” without thinking of that small yearly cost as part of their marketing budget.
Anyway, I saw the Vicious outfit at Nightshade and debated whether to buy the fatpack for L$4,000, which includes all the colors, or try my luck with the gacha machine. I ended up getting a few friends together, and we all played until everyone had a full outfits in all the colors, including the rare hat and collar. I spent less than half of what the fatpack costs, so that’s my suggestion if you want this outfit too. I’m still not a fan of gacha though. If this outfit had been a regular release, it would have come as a complete set instead of being split into pieces. It’s just a dress with a hat, after all.
In case you haven’t heard, there’s a new Premium Plus plan with no stipend. Designers are thrilled, of course. This plan costs $143 a year if you pay annually, or $191 if you pay monthly. But if you’re someone who buys lindens occasionally throughout the year, this plan probably isn’t for you. You don’t really save much, if anything at all, once you factor in the lack of a stipend.
I have to admit, I’m feeling a bit burnt out on Halloween events across the grid. I’m ready for cozy fall vibes and something more cheerful. But if you’re a Halloween lover, this is definitely your month. There are tons of hunts, freebies, and events happening right now, including Shop & Hop.
Remember Remarkable Oblivion? Yesterday I visited their Marketplace store again, and found this adorable Usagi Briar Bow (Special Edition). It includes a Bow&Headband version, or a separate Bow, to be worn with any hairstyle. I’m really into adorable head bands/bows accessories lately!!
Tee*fy and LaViere both released some adorable new things for April’s round of Collabor88. The Rachel Ruffle Sweater includes a long and short version, and comes in gorgeous colors with some floral prints! The Lovisa Ruffle Skirt fits with the sweater perfectly, and there are lots of colors to choose from too. I’m very fond of LaViere hair lately, the hairstyles are getting better and better! This new Gisele hairstyle comes includes a regular version with bangs neatly tucked behind the ear and a “Loose Bangs” version.
A few nights ago, I went to Pose Fair 2013! I’ve gone to Pose Fair every year, and have always found some new poses to add to my pose stand. This year, I discovered a new-to-me store called no wow. These poses are affordable, and adorable! I liked what I saw at Pose Fair so much, that I visited the no wow Main Store and bought everyyyyything.
According to the notecard included with my purchase, no wow is a team of 3 creators:
I loooove skins in Second Life. I get a new skin and make it perfect with tattoos. Rinse and repeat. This is how I enjoy playing Second Life. Recently, I tried on the new Coraline skin from Glam Affair, and to my surprise, it’s nearly perfect. Did I still add a bunch of tattoo fixes? Absolutely.
A blog reader asked me to share some skin details that I recommend, so I’ll do my best to explain my process here. I wear different tattoos for different skins, but generally, I either enhance or de-emphasize certain features. Most of my face tattoos are from Izzie’s, as I own nearly everything from the brand. This allows me to fix anything on a skin to make it suit my preferences. As for body tattoos, it depends on the body I’m wearing. Sometimes I don’t change anything; other times, I add details or remove shading, among other adjustments. You can absolutely mix and match skin details from different brands, as long as you can tint the colors to match.
What skin tattoos do I always wear?
FACE
Brows – Find any brow tattoo that you like and wear it if the default brows on the skin do not suit your preference. I typically wear white brows and tint it a very light blonde or brown. Then, I enable the HD brows on the LeLutka head and reduce the opacity.
Nostril Lighteninger/Highlight – I always lighten my nostrils.
Lip concealer – Sometimes the skin doesn’t need it, but most of the time, I feel that it does. I wear a combination of Izzie’s and Cazimi’s Lip Concealer (it’s free) if I want to lighten the area all around.
Blush/Contour Remover – I wear this 90% of the time, though not today. When I do wear it, I apply a layer of blush on top.
Face Highlights – I sometimes add to or remove highlights, depending on the skin. Izzie’s offers a great Highlight Corrector if you want to reduce shine. Recently, I’ve noticed many skins appearing somewhat flat, so I tend to enhance them. I enjoy adding a touch of highlight to the corners of the eyes, the philtrum, the nose, the forehead, and other areas.
Nose Shading Fix – If one side of your nose is heavily shaded, you need this to balance it out. I wear this 90% of the time, but lately, I’ve noticed that skin designers have begun to do this less frequently.
Nostril Changer – I use this 90% of the time because many skins have heavily shaded nostrils, which I find unappealing.
Ear Fix – Sometimes ears are ugly. Izzie’s has a great ear fix that sits on top of your skin’s ears.
Pale lipstick tattoo – I think it makes the HD lipstick look better.
Closed Eyes – You need this if you like taking closed eyes photos.
BODY
Neckfix – For a seamless transition between the head skin and body skin. Your body skin will have this layer available, usually for free. If not, you can get a neckfix layer from any brand and tint it to match.
Add Creases for hands and feet if you want more details.
Butt Crease Changer/Concealer
Inner Thigh Shadow Fix
Today I’m wearing the new Drift hairstyle from Truth. I love a realistic built-in hairline! This looks great in PBR, there’s no opacity issue, and it’s very natural.
Where are your eyes from? I’m dying to know!