Gogo’s Tutorials

  • | | | | |

    Second Life Photo Filters

    Heart

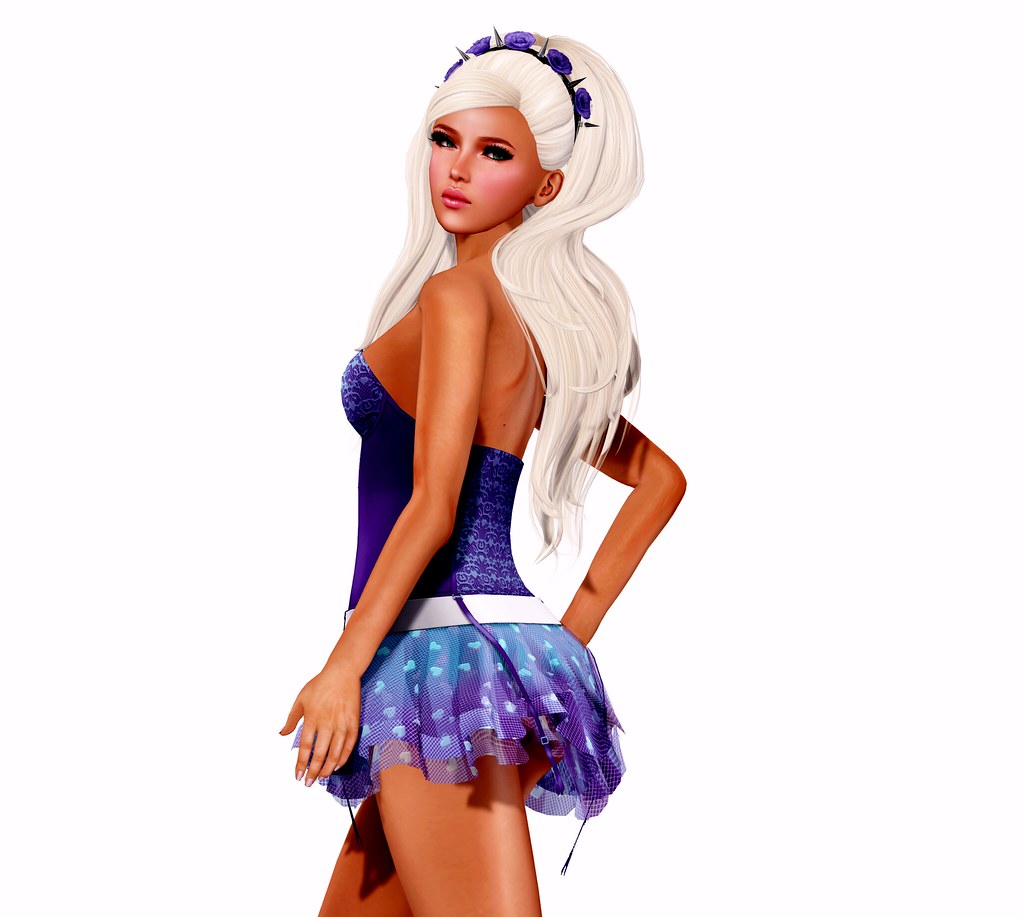
    I updated my Second Life Official viewer today, and noticed that filters are now available for SL pics!! How long has this been a feature? All of the filters are pretty basic, and can easily be done with a single click using any online image editor, if you’re not savvy with Photoshop. I’m impressed that SL has this feature, especially for my friends that don’t like to edit their photos, or don’t know how.

    What do you think about the new SL filters? Let me know in the comments!NEW SL Filters!

    Select filters from the drop down menuNEW SL Filters!Raw image from SL (Autocontrast filter)

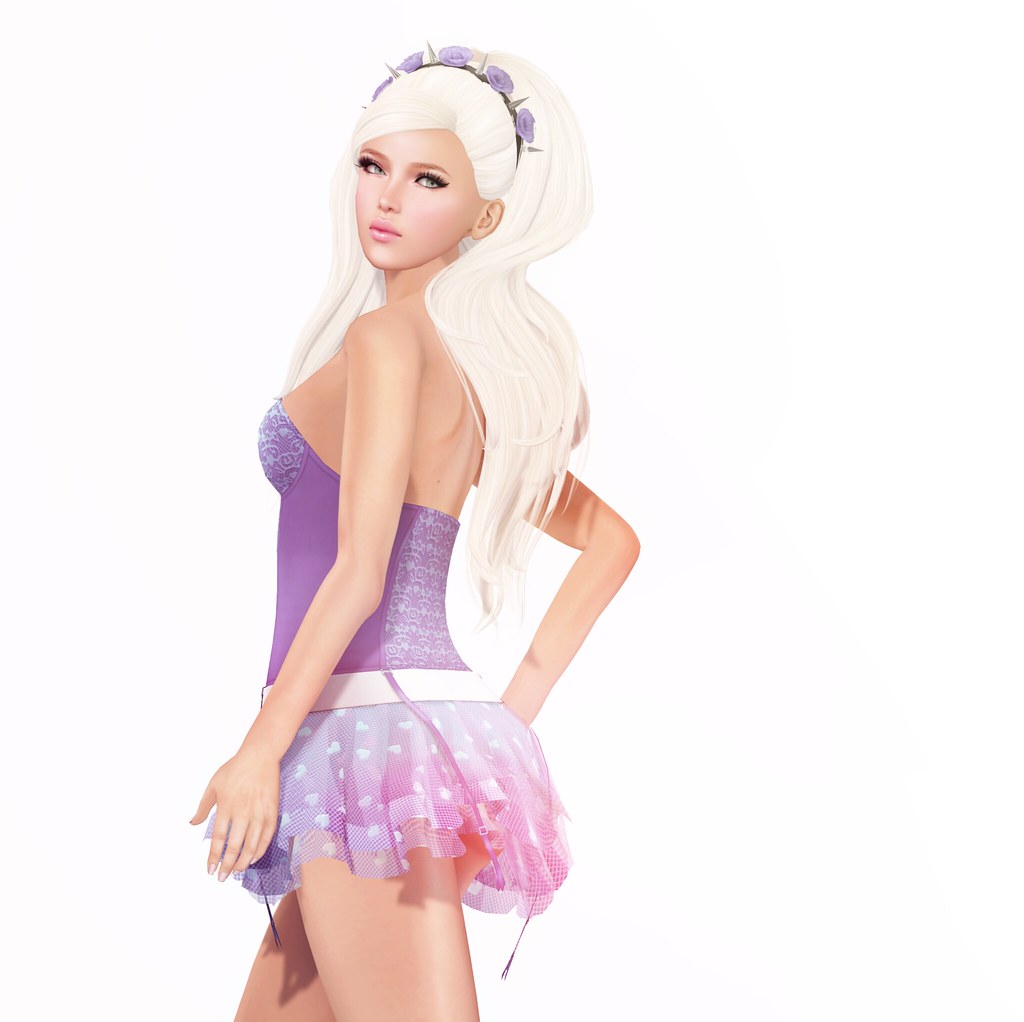
    What I’m Wearing:

    Pink Fuel Skin
    Truth – Grande 2
    Truth – Lilith Headband
    Katat0nik – (Sheen/Average) Heart Playgirl Dress

  • | | |

    Know your Mesh Lashes

    Mon Cheri

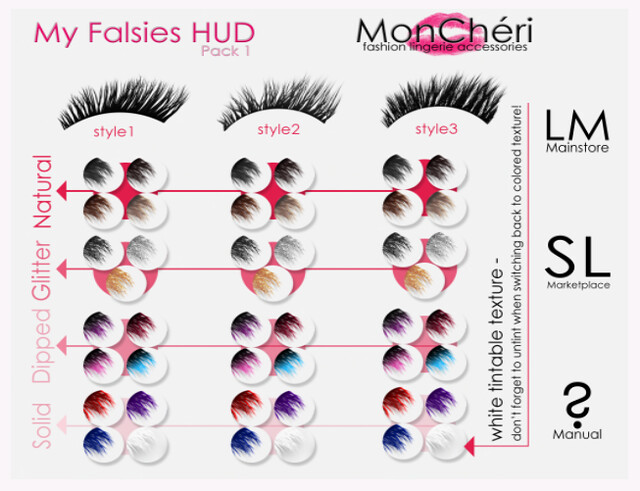
    I love lashes, my avatar feels naked without them! I won’t go anywhere without my prim/mesh lashes, so I’m always looking for new ones to add to my collection. Mon Cheri just released the new Falsies lashes that includes a fantastic HUD to change between 3 styles, and different textures style such as Solid, Dipped, Glitter, Natural, or even plain White, so you can tint them any color you want!
    Mon Cheri

    I think that these lashes are really nice, and easy to fit, but they’re also very full & long. When I wear these, I will probably not wear the lower lashes, and just wear the top lashes + some more subtle lower lashes. The Mon Cheri lash pack includes a top prim, bottom prim, plus top+bottom prim.
    Mesh Lashes

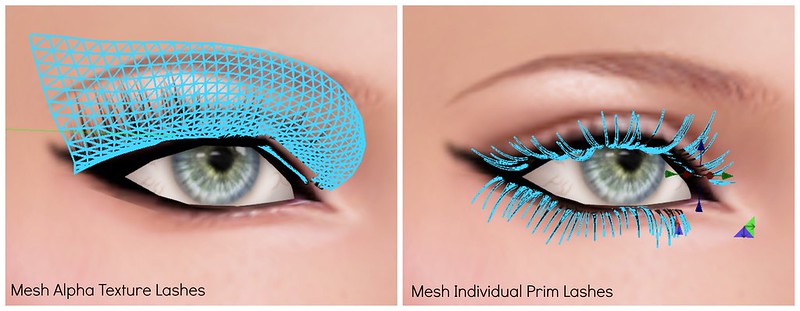
    A lot of people don’t know the difference between their mesh lashes, cos I see the same questions being asked over and over again. The most popular one is, “Why are my lashes clumpy?” Because you’re wearing mesh Individual Prim Lashes or Sculpted Prim Lashes (these are the only two styles that will clump). There’s probably a fix to this, but not if you like to have your graphics set to Ultra & with shadows turned on.

    A Guide to Lashes:

    Mesh Individual Prim Lashes = Individual lashes, no alpha glitching, will clump from far away.

    Mesh Alpha Texture Lashes = Single prim with alpha texture applied, does NOT clump, has alpha glitch with the default lash (darn bug that LL fixes, and breaks with each viewer update).

    Other lash styles:

    Prim Alpha Lashes = What we all have. They’re just regular prims with alpha texture applied. I love these though, cos the lashes are so fine & pretty!

    Sculpted Prim Lashes = Similar to Mesh Individual Lashes

    Texture Lashes = tattoo layer
    Mesh Alpha Texture Lashes

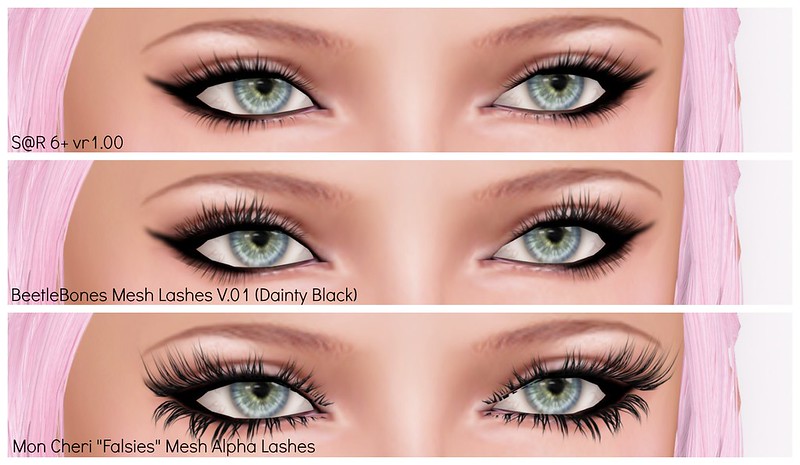
    Mesh Alpha Texture Lashes are great! I love my S@R ones, but I usually pair it with something else on the top lashes to make it fuller. To have really great lashes, you should wear the lash alpha to get rid of the default SL lashes AND add a black eyeliner, this will fill in any gaps and create a nice smooth line where the prim meets your eyelid.

    Do you have any other tips to add to this? What are YOUR favorite lash brands or lash styles?
  • | | | |

    How to make poses in Second Life, part 2 / mirror

    This is How to make poses in Second Life, part 2! I will show you guys a super easy way to mirror poses in DAZ Studio (version 4.6). Big thanks to Melanie, who showed me how to do this last year!

    How to make poses in Second Life, part 2 / mirror

    How to Mirror Poses in Daz Studio

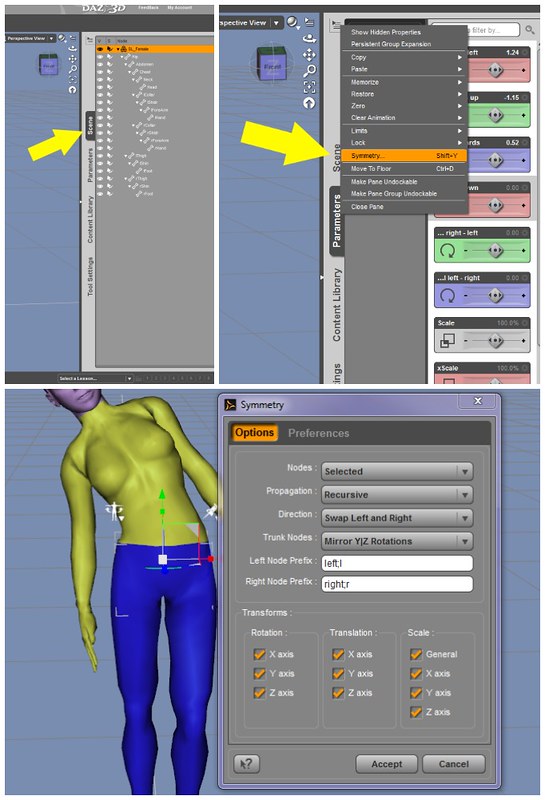
    1. Select the figure in the Scene Tab.
    (You can also select the figure simply by clicking on the SL avatar in the main window. I usually click on the Pelvis to select.)

    2. Click on the ‘Active Tab’ options button on the Parameters Tab. This button is in the upper right corner of the tab.

    In the menu that appears, choose “Symmetry.”

    In the Symmetry Dialogue Menu, choose the following settings:

    Nodes: Selected
    Propagation: Recursive
    Direction: Swap Left and Right
    Trunk Nodes: Mirror Y|Z Rotations
    Left Node: left;l
    Right Node: right;r

    Transforms: Rotation: check x, y, z
    Translation: Check x, y, z
    Scale: Check all

    3. Press ‘Accept’ on the bottom

    Done!

    Instructions modified from the How to do Mirror Symmetry DAZ3D tutorial to work for SL.

    Read Part 1 – How to make poses in Second Life

    How to make poses in Second Life, part 2 / mirror

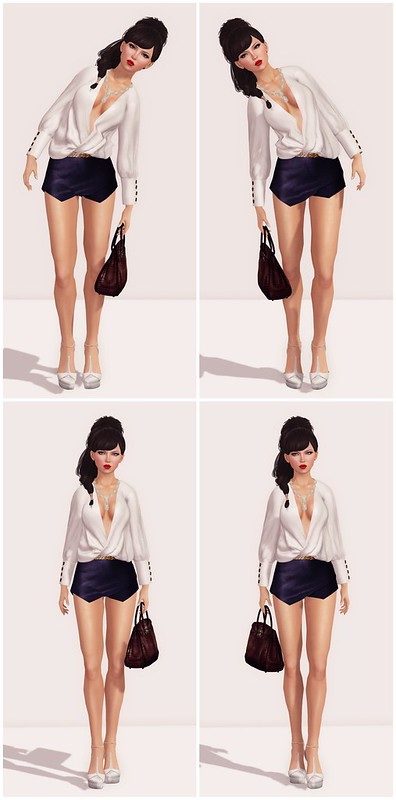
    I made two poses and mirrored them for fun! Maybe some day I’ll package these tutorial poses and put them on MP!

    What I’m Wearing:

    Pink Fuel – Harley (Peach)
    Truth Hair – Rocky
    Ricielli – (S) Asymmetrical Shorts /purple
    Ricielli – (S) Braided Belt
    Ricielli – (S) Satin Top /white
    Ricielli – The Birkin Bag (R HAND) /wine
    Sax Sheperd Designs – Frills (Ione) Necklace (Hang)
    ELEGANZA by Steffen Garcia (White)

  • | | |

    Editing Shape w/o the Light & Pose

    Editing Shape w/o the Light & Pose

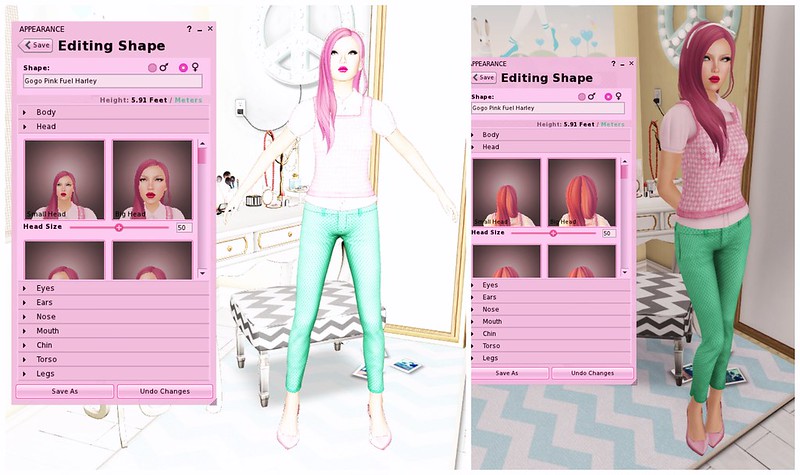
    It use to drive me insane when I tried to edit my shape, and the glaring bright light made it impossible to see my avatar’s features! I also was not a fan of the ‘edit’ pose, cos I prefer to use my own poses — even when I’m editing jewelry or clothes. A few years ago, I think SL introduced a feature in the official viewer (and maybe TPVs too), to  uncheck going into the automatic position for appearance and build/edit. I’ll show you guys how!

    I had assumed that many people already knew about this lil’ feature, but I asked my friends and some of them didn’t know.

    I’m using the official SL viewer, with the Starlight skin, so the instructions are for this viewer only, but it’s probably similar in TPVs.

    To get rid of the edit pose:

    Go to Preferences -> Move/View/Display tab -> Move/View tab -> find Automatic position for: Build/Edit and Appearance, uncheck Appearance.

    I have Build/Edit unchecked too, but just the Appearance controls Editing Shape.

    Now let’s talk about the bright light! I actually accidentally discovered this, when I asked my friend if she had the light and she said yes, since I haven’t seen it myself in years. What I discovered was that, with low graphic settings, you will get the light when editing appearance, cos “Advanced Lighting Model” is disabled/unchecked.

    To get rid of the light:

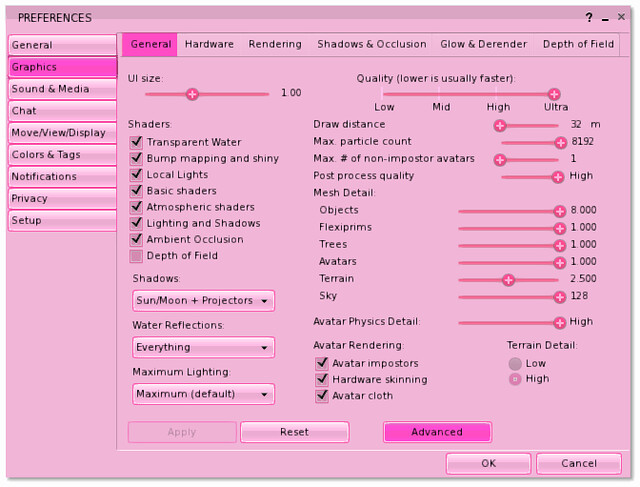
    Go to Preferences -> Graphics tab -> make sure your graphics Quality is higher than Low, Advanced Lighting Model should be checked. That’s it. It’s usually on  by default, if your graphics quality is Medium to High.

    Since the introduction of mesh clothing, I like to stand on my pose stand, change my outfits, and adjust my shape to fit the clothes without going into the editing pose! It’s sooooo useful, I hope this helps you guys too!

    Happy Editing!

  • | | |

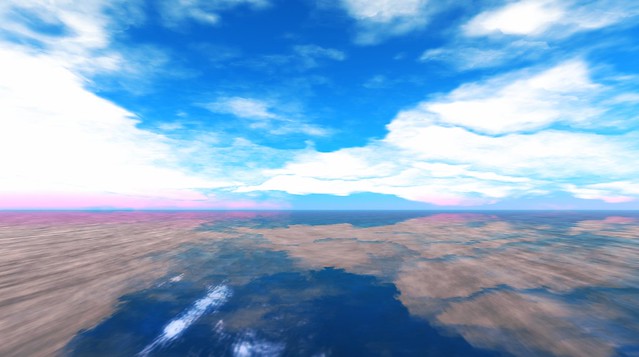
    New Clouds for Second Life

    new clouds

    New Clouds! Cumulo-Nimbus

    Cotton Candy Skies

    Default SL Clouds

    Tired of looking at the same old clouds? Check out these gorgeous new clouds, first available in the Firestorm viewer over three weeks ago. I don’t use a Third Party Viewer, so I didn’t get a chance to play with them, until Ziki showed me how to get these gorgeous clouds in the official Second Life Viewer too!

    Vincent Nacon created the cloud files, and has a clouds tutorial for Firestorm posted on the Second Life Forum.

    If you want these files in the official Second Life viewer, just download the clouds2.tga file, and replace the existing clouds2.tga file in your Second Life folder on your computer. Read Vincent’s tutorial to get the download links for the .tga files.

    Find Clouds2.tga in your Second Life folder at (or elsewhere, it depends on your computer):

    C:Program Files (x86)SecondLifeViewerapp_settingswindlightclouds2.tga

    After you replace the clouds2.tga file, relog. You’ll have to do this each time you want to play with a different cloud type, at least until the official viewer includes a drop-down menu for multiple cloud options.

    I use the Starlight Skin by Hitomi Tiponi with my sl viewer, so maybe he can add a drop-down menu! *crosses fingers*

    Are you as excited about the new clouds as I am?

  • | |

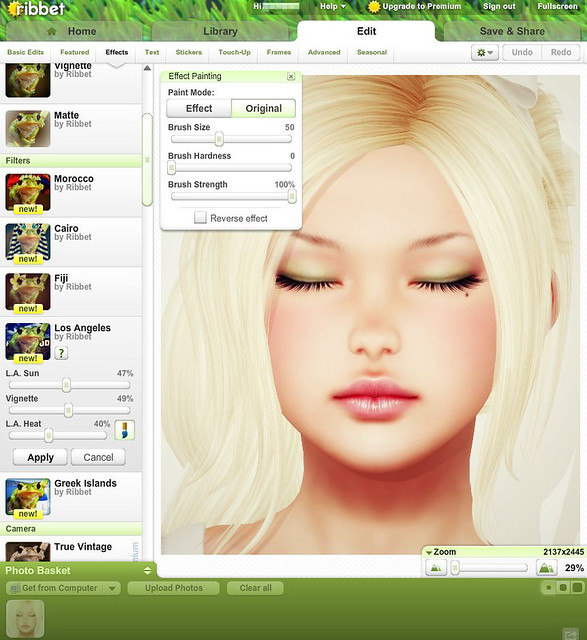
    Ribbet.com, Online Photo Editor

    Ribbet.com

    Today my Plurk friends told me about a new online photo editor called Ribbet! Last year, when Picnik integrated with Google (closed), a bunch of us (former Picnik addicts) went to Picmonkey. I liked Picmonkey a lot, I even signed up or a whole year of premium service. However, it lacked one really important feature that Picnik had, which is the ability to upload directly to Flickr, instead of having to save the image first to hard drive, then re-upload to Flickr.

    I took Ribbet for a test drive today, and I’m already a fan. It has everything that Picnik had, and more! It is Picnik 2.0! All the premium features are FREE now (that may change soon), but I would happily splurge on the upgrades just cos I love online photo editors for simple blogging edits instead of always relying on Photoshop.

    Are you using any online photo editors? If so, which one?

  • |

    How to sell Lindens

    Do you know how Market Sell vs. Limit Sell differs? If you don’t, you’re losing money every time you cash out your Lindens. I discovered back in 2007 after selling Lindens a few times, that I could set a better rate than what’s offered by default on the Linden Dollar Exchange.

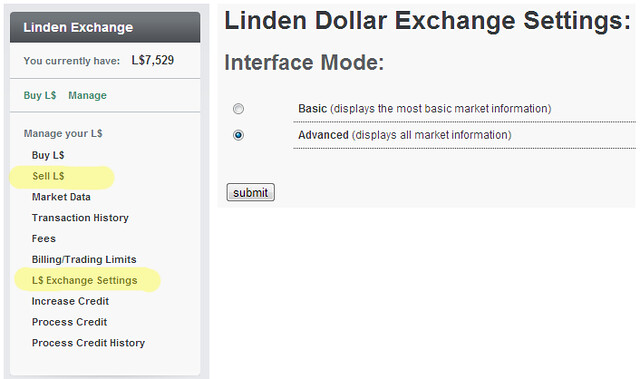
    First, go to L$ Exchange Settings in your SecondLife.com dashboard and change the Interface Mode from Basic -> to Advanced.

    How to sell Lindens $L

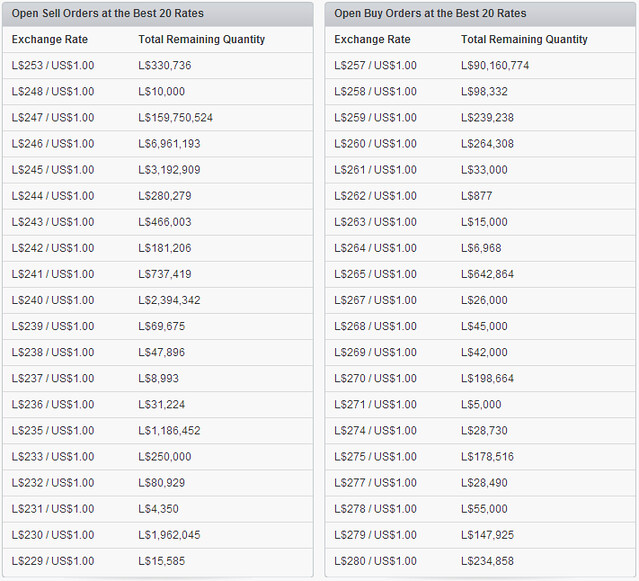
    Then go to the Sell L$ page and look at the Open Sell Orders at the Best 20 Rates, and decide what Exchange Rate you want to sell at. I typically sell at L$248/$1.00US (sells almost instantly, if there’s less than a million Lindens listed already), or some people sell at L$247/$1.00US and the wait may be a few hours to a few days. Any exchange rate higher than the usual lowest rate or not listed there, will sell instantly.

    For example, in the picture below, you’ll see that there’s L$330,736 listed for the L$253/US$100 rate, and that person could have listed for $248 and sell instantly, but for some reason they didn’t (and losing money in the process).

    How to sell Lindens $L

    As a seller, you want to exchange the least number of Lindens for $1USD. The same concept can be applied to Buy orders, except in the reverse. You’d want the most Lindens for your $1USD if you’re buying.

    How to sell Lindens $L

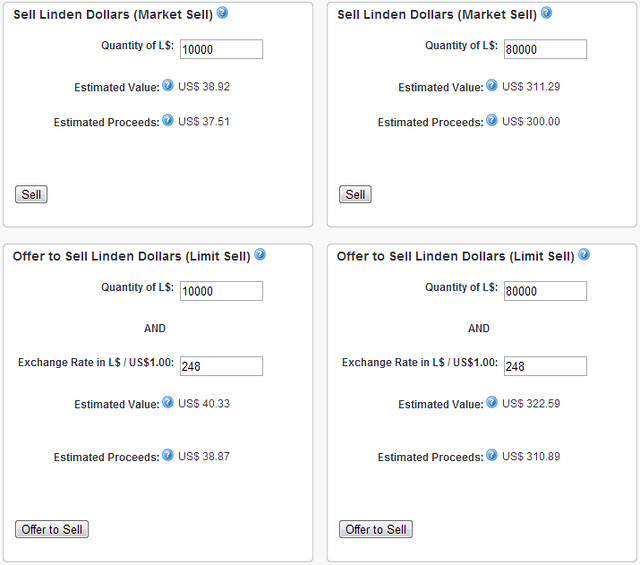
    Here’s an example of how much money you’d lose selling at Market Sell (the rate determined by the Linden Dollar Exchange vs. Limit Sell (the rate set by you).

    $10,000L @ Market Sell = $37.51US proceeds
    $10,000L @ Limit Sell = $38.87US proceeds
    Difference = $1.36US

    That’s not much of a difference, but what if you’re selling hundreds or thousands of Lindens per month?

    $80,000L @ Market Sell = $300.00US proceeds
    $80,000L @ Limit Sell = $310.89US proceeds
    Difference = $10.89US

    Think of how much money you could be losing (or gaining) if you used Limit Sell to your advantage!

    Did this tutorial help?

  • | | |

    How to make poses in Second Life

    I’m doing this tutorial to help anyone that wants to learn how to make poses in Second Life. I am using DAZ Studio, but you can use QAvimator, Poser, and a few other programs too. There are tutorials out there for those already, so I’ll just focus on DAZ.

    Download and Install:

    DAZ Studio 4.5 (free)
    Second Life avatar meshes in .obj and .cr2 format

    To make poses for Second Life, you have to use the SL .obj and .cr2 avatar files, not the default DAZ avatar. This is the most important step in the pose-making process for DAZ, but it’s similar in other programs too. In some cases, you can export your own shape to use, but I couldn’t get it to work right in DAZ so we’ll skip that for now.

    1. Importing the Second Life .obj and .cr2 files into DAZ

    JuicyBomb - Pose tutorial

    File -> New (to clear your scene) then,
    File -> Import

    JuicyBomb - Pose tutorial

    Select SL_Female.cr2, then Open it in DAZ

    JuicyBomb - Pose tutorial

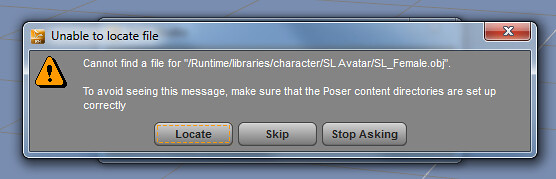
    Locate the SL_Female.obj file, then Open it in DAZ

    Read More “How to make poses in Second Life”

  • | |

    JUICYBOMB.COM – Studio Windlight Settings

    Looking for my Studio Windlight Settings? Windlight is now obsolete. I’ve converted this into Studio EEP settings. Get it on Marketplace.

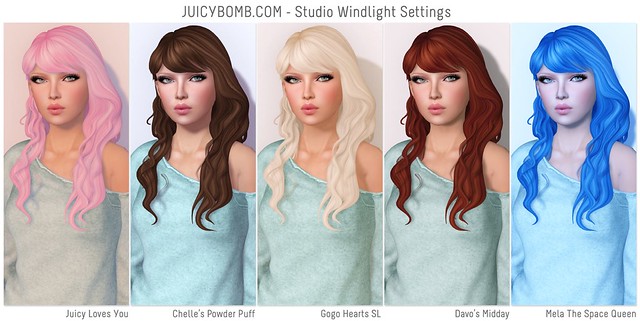
    My Facebook page reached 1,000+ likes this week! As a “thank you” gift to all of my loyal readers, I have packaged five of my favorite Studio Windlight settings for you to download.

    I haven’t ever shared these Windlight Settings before, even though tons of people have asked! Please enjoy them, and let me know if you like them!

    JUICYBOMB.COM - Studio Windlight Settings

    A lot of people don’t know this, but the direction that your avatar faces matters when using a Windlight Setting made by someone else. When I am on a pose stand, my avatar is always facing SOUTH, and the blank prim background is behind me. All of these settings were created with Ultra graphics settings, but they’ll work for lower graphics settings too. If your picture doesn’t look exactly like mine, it’s probably due to having a different graphics card & graphics settings.

    settings

    Download the JUICYBOMB.COM – Studio Windlight Settings!

    To install, locate this folder on your computer and copy all of the Windlight Settings there:

    C:UsersYOURNAMEAppDataRoamingSecondLifeuser_settingswindlightskies

    Feel free to modify the Windlight Settings for your own personal use.

     Update: Thanks to everyone who have downloaded or blogged my Windlight Settings!! I have noticed that some of you guys are using it for in-world scenery photography. When I created these, I didn’t pay attention to the sky color at all, cos it wasn’t visible with the prim background behind me. Some of the skies are dark/brown/black, so if you want to use the settings outdoors, take a moment to adjust your sky! 🙂

  • | |

    Emotes & Slow Motion Animation

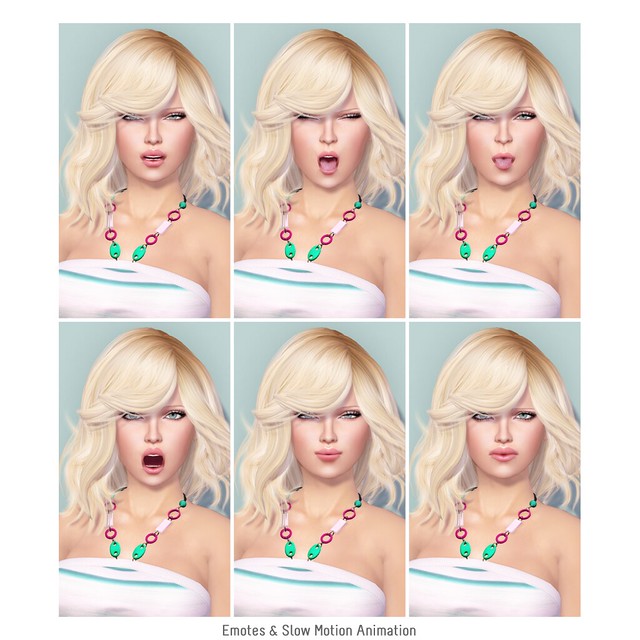
    Cajsa asked me to contribute my Emotes & Slow Motion Animation tutorial for the Blogger Carnival at SL9B exhibit, so I’ve decided to update the images, but the instructions are all the same. In the original tutorial from 2008, I used another HUD to create the emotes but this year, I have a new favorite! I have mentioned the AnyPose Expression HUD before, and it works beautifully to create facial expressions and also, can control eyes position and hands!

    SLB1

    How to create facial expressions using Emotes & Slow Motion Animation:

    • Press CTRL+ALT+SHIFT+D, to bring up the Advanced client menu
    •  Go to Advanced -> Character -> Slow Motion Animations and click to enable it (Slow Motion Animations is a feature that slows down animations on your client only, so others will not see this but it is useful when trying to capture dances, emotes, poses, etc.)*note: Don’t forget to uncheck Slow Motion Animations once you’re done using it, otherwise animations will look too slow on your client.)
    • Play with the random expressions on the Emoter and snap away!!

    Emotes & Slow Motion Animation

    To make the facial expression above, I used a combination of “Open Mouth” and “Tongue” with Slow Motion Animations enabled. There’s two ways to do this — snap a dozen images and pick the one that you like best, or focus on just the eyes and snap an image, then focus on the mouth area — and combine two that you like best in Photoshop (or any graphics program of your choice). For this image, I have decided not to use PS, and waited patiently to get a combination that I liked. I’m also wearing tattoo lashes, so I don’t have to go without lashes or bother with adjusting prim lashes.

    Here are tutorials from a few other SL residents on emotes that I really like:

    Ophelia’s Gaze: How To Use Lip Sync To Make Second Life Avatar Screenshots Come Alive
    Grid Expectations: subtle facial expressions

    Be sure to visit Blogger Carnival at SL9B exhibit, and explore all the birthday sims!